How to program an Arduino
An Arduino sketch is a small C++ program with two required functions. This guide walks through the handful of functions that cover most beginner projects, with code for each, then shows how to test sketches without a board and how to upload them to a real Arduino Uno with the Arduino IDE.
The shape of every sketch: setup() and loop()
The Arduino core calls setup() once, when the board powers up or is reset, and then calls loop() again and again for as long as it has power. Put one-time configuration (pin modes, starting the serial port) in setup(), and the behaviour that repeats in loop(). There is no main() to write: the core provides it.
Sketches are written in C++ with the Arduino functions built in. Statements end in a semicolon, blocks sit in braces, and // starts a comment.
// Blink: the on-board LED on for one second, then off for one second.
void setup() {
  pinMode(LED_BUILTIN, OUTPUT);
}

void loop() {
  digitalWrite(LED_BUILTIN, HIGH);
  delay(1000);
  digitalWrite(LED_BUILTIN, LOW);
  delay(1000);
}
Digital outputs: pinMode, digitalWrite and delay
pinMode(pin, OUTPUT) makes a pin an output. digitalWrite(pin, HIGH) then drives it to the board’s logic voltage (5 V on an Uno) and digitalWrite(pin, LOW) to 0 V. LED_BUILTIN is the pin of the board’s own LED, pin 13 on the Uno.
delay(ms) pauses the sketch for that many milliseconds. It is the easiest way to time things, but nothing else happens while it waits, which matters once a sketch must also watch a button.
Print to the Serial Monitor
Serial.begin(9600) opens the serial port at 9600 bits per second, and Serial.print and Serial.println send text and numbers to the computer. In the Arduino IDE open Tools, Serial Monitor and set the same speed. Printing values is the most useful debugging habit you can build.
int count = 0;

void setup() {
  Serial.begin(9600);
  Serial.println("Hello from the Arduino");
}

void loop() {
  Serial.print("Count: ");
  Serial.println(count);
  count = count + 1;
  delay(500);
}
Read a button with INPUT_PULLUP
An input pin that is connected to nothing floats and reads at random. INPUT_PULLUP turns on a resistor inside the chip (20 to 50 kΩ on the ATmega328P) that pulls the pin up to 5 V. Wire the button between the pin and GND: released, the pin reads HIGH; pressed, it reads LOW. No external resistor is needed.
const int buttonPin = 2;
const int ledPin = 13;

void setup() {
  pinMode(buttonPin, INPUT_PULLUP);
  pinMode(ledPin, OUTPUT);
}

void loop() {
  // The button joins pin 2 to GND, so pressed reads LOW.
  if (digitalRead(buttonPin) == LOW) {
    digitalWrite(ledPin, HIGH);
  } else {
    digitalWrite(ledPin, LOW);
  }
}Read a voltage with analogRead, scale it with map
analogRead(A0) measures the voltage on an analogue pin with the board’s ADC. The Uno’s ADC has 10 bits, so 0 V reads 0 and 5 V reads 1023: each step is about 4.9 mV. A potentiometer with its ends on 5V and GND and its wiper on A0 gives any reading in between.
map(value, fromLow, fromHigh, toLow, toHigh) rescales a number with whole-number arithmetic. Here it turns 0 to 1023 into 0 to 255 for analogWrite, which sets the PWM duty cycle on pins 3, 5, 6, 9, 10 and 11 of the Uno, so the LED dims smoothly.
const int potPin = A0;
const int ledPin = 9;   // a PWM pin on the Uno

void setup() {
  pinMode(ledPin, OUTPUT);
  Serial.begin(9600);
}

void loop() {
  int raw = analogRead(potPin);                // 0 to 1023
  int brightness = map(raw, 0, 1023, 0, 255);  // 0 to 255
  float volts = raw * (5.0 / 1023.0);
  analogWrite(ledPin, brightness);
  Serial.print("Reading ");
  Serial.print(raw);
  Serial.print(" is about ");
  Serial.print(volts);
  Serial.println(" V");
  delay(200);
}Time things without delay() using millis()
millis() returns the milliseconds since the board started. Comparing it with the time of the last change lets loop() keep running, and reading buttons, between changes. Subtracting in unsigned long, as below, stays correct when the counter wraps after about 49.7 days.
const int ledPin = 13;
const unsigned long interval = 500;  // ms between changes
unsigned long lastChange = 0;
int ledState = LOW;

void setup() {
  pinMode(ledPin, OUTPUT);
}

void loop() {
  unsigned long now = millis();
  if (now - lastChange >= interval) {
    lastChange = now;
    ledState = (ledState == LOW) ? HIGH : LOW;
    digitalWrite(ledPin, ledState);
  }
  // Other work can go here: nothing above blocks.
}
Test your sketch without a board
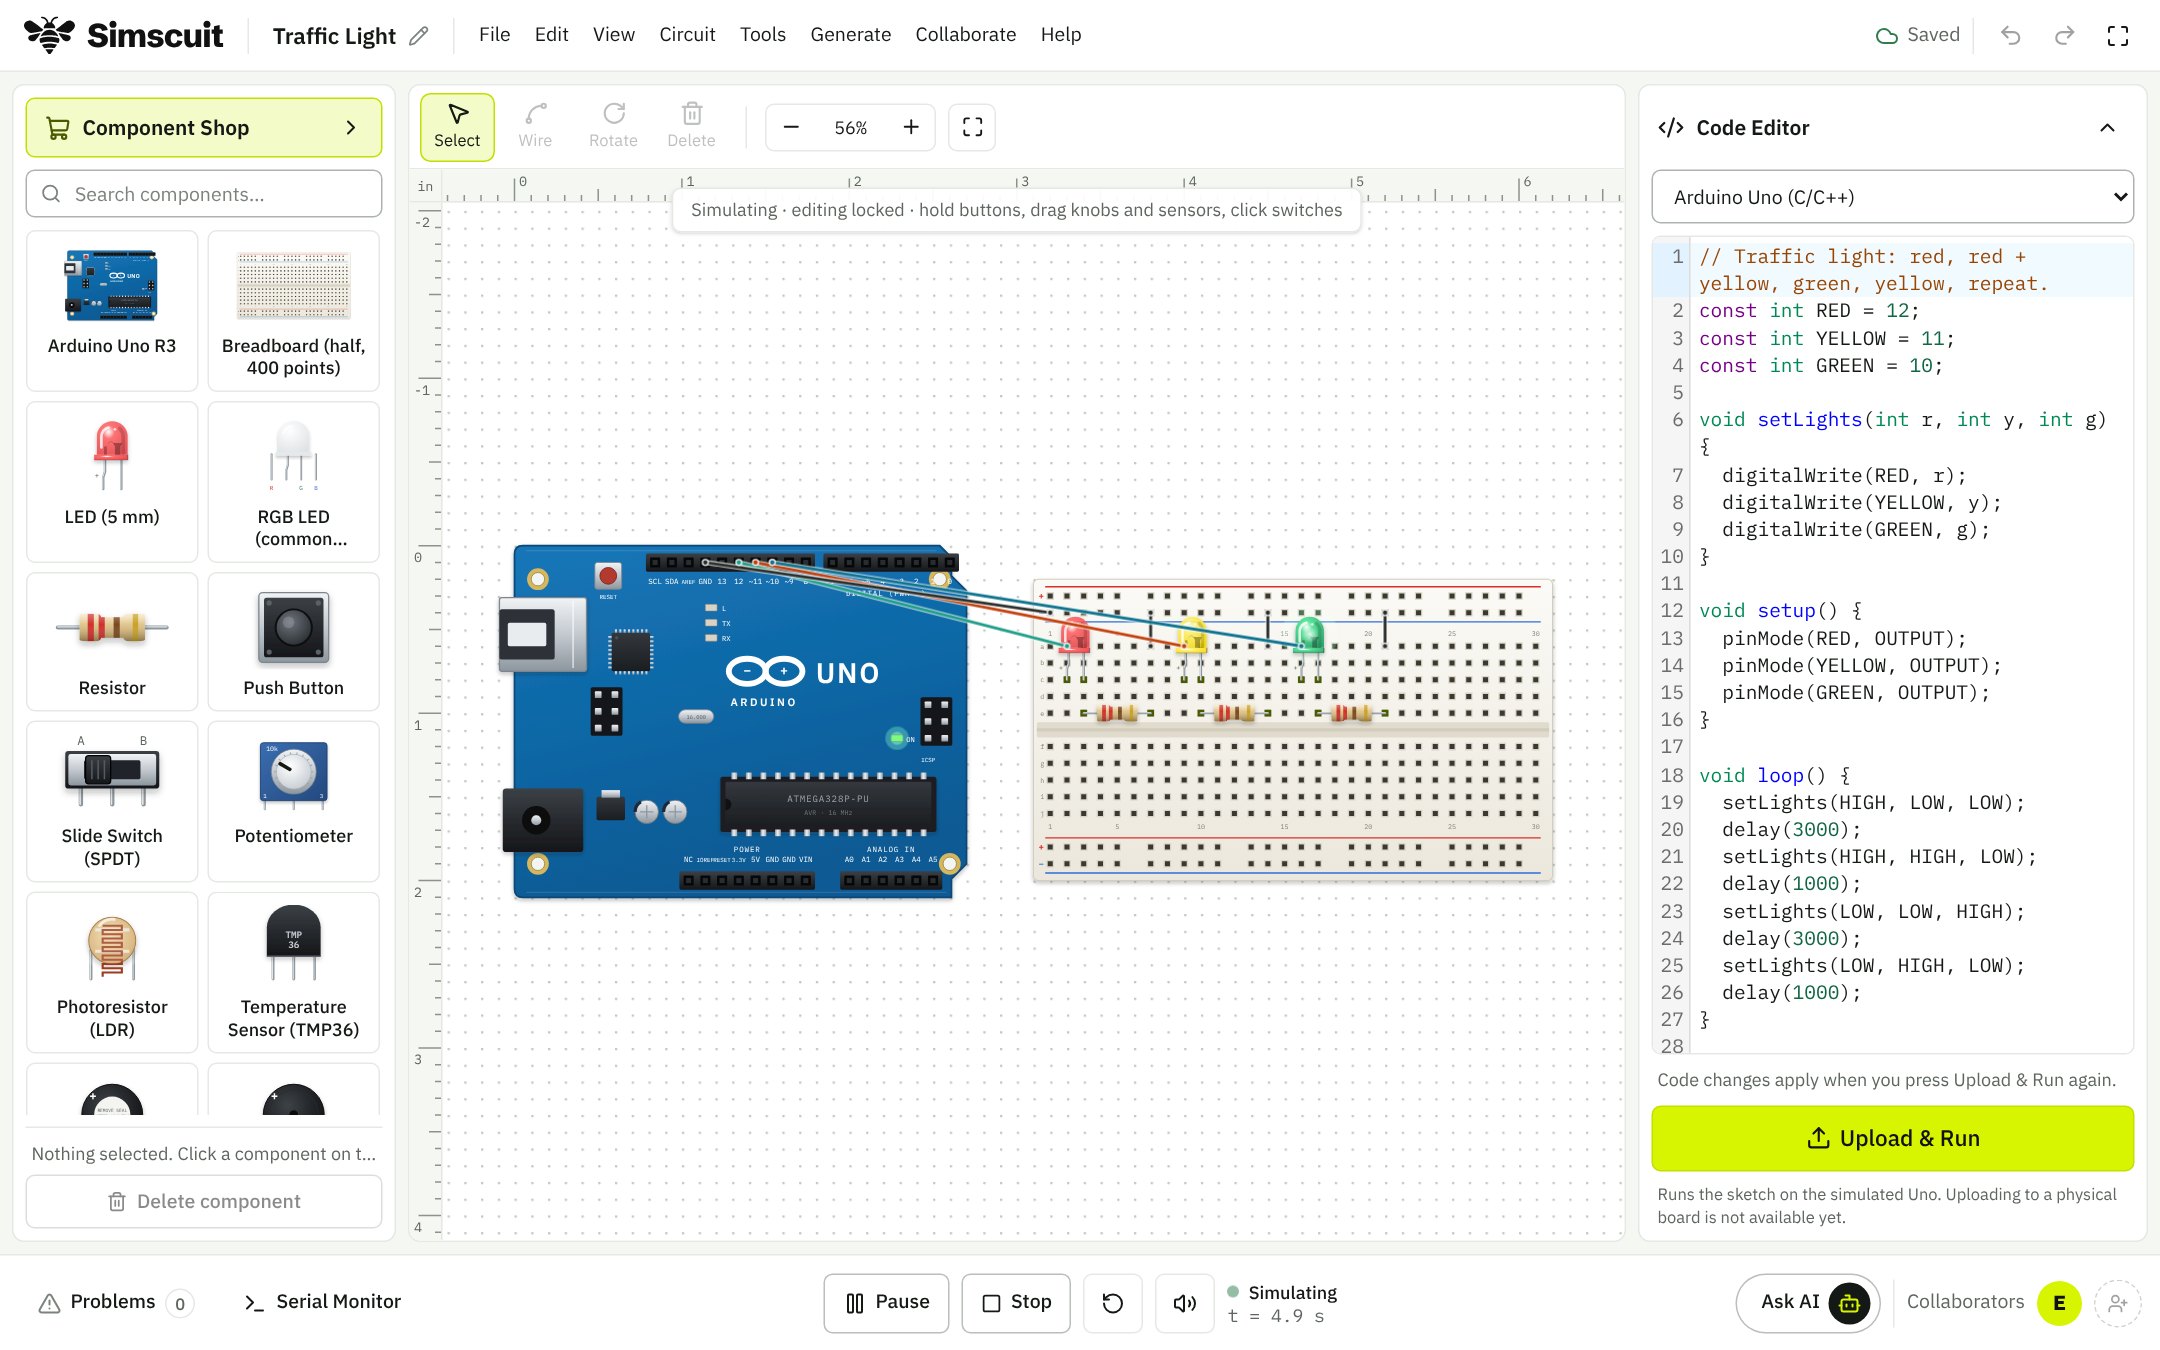
Every sketch on this page runs in Simscuit. Build the circuit on a breadboard in Circuit Studio, paste the sketch into the code editor and press Run Simulation: the LED lights, the potentiometer turns under your mouse, and the Serial Monitor shows what the sketch prints. Mistakes cost nothing, and a pin asked for too much current says so instead of failing quietly.
Be clear about what that proves. Simscuit runs sketches in its own Arduino interpreter, not on an emulated ATmega328P, so it checks your logic and wiring rather than exact chip timing. It supports the common Arduino functions and a documented list of libraries; interrupts, classes, structs, pointers and other #include libraries are not supported yet.
Put the sketch on a real Arduino Uno
Compiling and uploading to a physical board from Simscuit are not available yet: the Hardware Programmer writes, checks and downloads sketches and can read a connected board over USB, and uploading is coming. Until then, export the sketch (File, Export, Code (.ino)) and use the free Arduino IDE from arduino.cc.
- Install the Arduino IDE and open the .ino file, or paste the sketch into a new one.
- Connect the Uno with a USB cable.
- Choose Tools, Board, Arduino Uno, then Tools, Port and the port that appeared when you plugged it in.
- Click Verify (the tick) to compile. Fix any errors it reports.
- Click Upload (the arrow). The board’s TX and RX lights flicker, then the sketch starts.
- Open Tools, Serial Monitor at 9600 baud to see the output.
Common beginner mistakes
- A missing semicolon or brace: the compiler’s first error is usually on the line before the one it names.
- Writing = (assignment) where == (comparison) was meant inside an if.
- Forgetting pinMode, so an output pin only glows weakly through its pull-up.
- A floating input: a button with no pull-up or pull-down reads at random.
- A Serial Monitor speed that differs from Serial.begin, which shows garbage.
- int overflow on the Uno: int is 16 bits there, so 300 * 200 does not fit. Use long for large numbers.
Keep learning
Questions
What language does Arduino use?
C++, with the Arduino core’s functions (pinMode, digitalWrite, analogRead, Serial and so on) built in and a main() that calls setup() once and loop() repeatedly.
Can I upload code to a real Arduino from Simscuit?
Not yet. Export the sketch as an .ino file and upload it with the Arduino IDE; uploading from Simscuit’s Hardware Programmer is coming.